
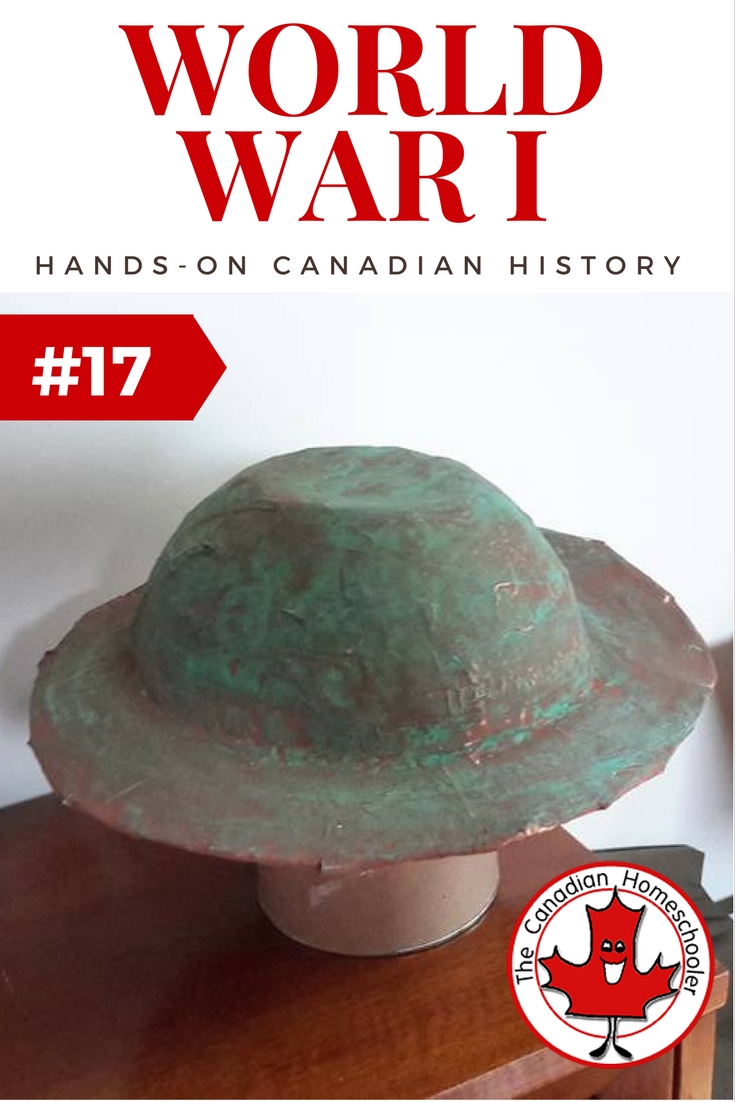
When the world went to war in 1914, Canada joined in, sending forces to Europe to aid the cause. Our soldiers fought bravely and were featured in some key battles, such as Vimy Ridge. An important part of WWI uniforms was a Brodie helmet – a metal dome helm with a brim and a chin strap. Here is a great picture of one close up.
Make a Paper Mache World War I Brodie Helmet
Since my boys love anything combat / warrior related so we decided to try making a brodie helmet of our own out of paper mache.
Materials Needed:
- flour, water, salt (for the paper mache, as directed in this post: No Cook Paper Mache Paste)
- newspaper strips
- a bowl
- a large piece of cardboard
- brown and/or green paint
Step 1. Find a bowl that isn’t too huge for your head. I used a Tupperware bowl from our kitchen that the kids always just use as a helmet anyway…. Place it face down on top of your large piece of cardboard and trace around the a circle about an inch or two out from the bowl’s edge. Cut out the circle. Now you will need to cut a hole in the middle of that circle to make a ring that you can tightly fit around your bowl to make a brim. Before I did that, I chose to cover my bowl in plastic wrap so that I could pry the final product of the bowl more easily when dry.
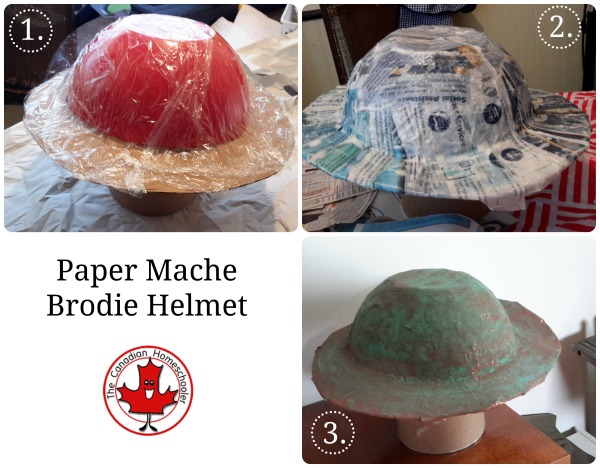
Step 2. Mix up some paste and tear your newspaper strips. Cover your bowl and brim in newspaper strips that you have dipped into the paste before applying. Smooth the newspaper as much as possible. We found covering the brim in up and down strips worked best, and then covering the dome of the helmet in a mix and match pattern helped make it stronger. Overlap the pieces with no more than about 2 layers thick. Allow to dry. Save the glue in the fridge while it dries (I poured mine into a mason jar for the night with a sticky note so no one would be curious to taste it….). When dry, apply another layer of newspaper. If you want, use paper with no printing on it to make it easier to paint. Allow to dry.
Step 3. Paint your helmet and allow to dry. We chose to use brown as a base coat and then, when dry, wipe on a layer of green to give it a rustic effect.
Step 4. Tape, staple, or glue a string on to be used as a chin strap, if you wish. My boys opted against it.
Now you are ready to keep your head safe under artillery fire with your own brodie helmet.
See all 31 Days of Hands-on Canadian History.

- How to Keep a Toddler Busy While Homeschooling - March 21, 2024
- 25+ Things Your Kids Learn From Video Games - March 20, 2024
- 10 Words For New Homeschoolers - March 20, 2024